
For the past 11 years I have used Microsoft Word for most of every workday.
It’s been a rocky relationship. The Word of a few years ago was not a streamlined experience. It was missing some convenience features that even Google Docs offered.
I even attempted to switch to Google Docs around 2012, but that solution was (and still is) missing lots of features that I need. Plus, having to export everything to a Word doc to meet clients’ expectations was a pain.
Today’s Word is really good. Every single thing I want to do with it, I can do in the latest version (that’s 16.26 at the time of writing). And it’s easy to do them, in many cases with shortcut keys that save a lot of time for heavy users like me.
I know, however – because I receive many Word documents from businesses every week – that most people don’t know how to get the best out of Word.
So, let’s change that.
The tips here are for the Mac version of Word, but they should all be in the Windows version too (shortcuts etc. will be different though).
1 Use Styles – Word’s most basic, powerful and ignored pro feature
This first tip is very, very basic. But not a soul is actually doing it. Nobody. Ok, almost nobody. But still far too few.
Styles are a core feature of Word. They’ve been in for ages. Styles make it really easy to format your document, and to make your document look good. But nobody seems to understand them.
(This really makes me wonder – why isn’t Microsoft doing more to help people understand Styles? Do they have training courses to sell or something?)
When I receive a doc from someone who has used Styles to make their document, I have instant respect for them. Because at some point in their lives, they have looked at the big Quick Styles box that dominates Word’s Home menu, and they have thought:
“That’s big for a reason. It’s probably important. I should figure out what it does. Oh look, this is easy and really good.”
And at that moment, they took a big step towards becoming a Word pro.
If you aren’t using Styles, you’re probably doing things like this instead:
- Making headers by clicking the B bold button and changing the font size and colour
- Spacing out your doc by menu-clicking (right-clicking) text, choosing Paragraph, and then setting “Before” and “After” for each individual paragraph
- Choosing a new font, and then wondering why it doesn’t stick for the rest of your document
If you’re doing the things above, your Word docs are probably a bit… let’s say, haphazard.
(Confession: I used to do all those things too, that’s how I know about them.)
And worse, you probably ask aloud often, “WHY IS THIS STUPID APP DOING THAT?!” I’ve heard this lots of times, mostly from my parents.
Using Styles will solve these problems!
You only need a few Styles, and they don’t take long to set up.
So…
Step 1
Go into Word now, make sure you’re in the Home menu, look for the big Quick Styles box, and find the one called “Normal”.
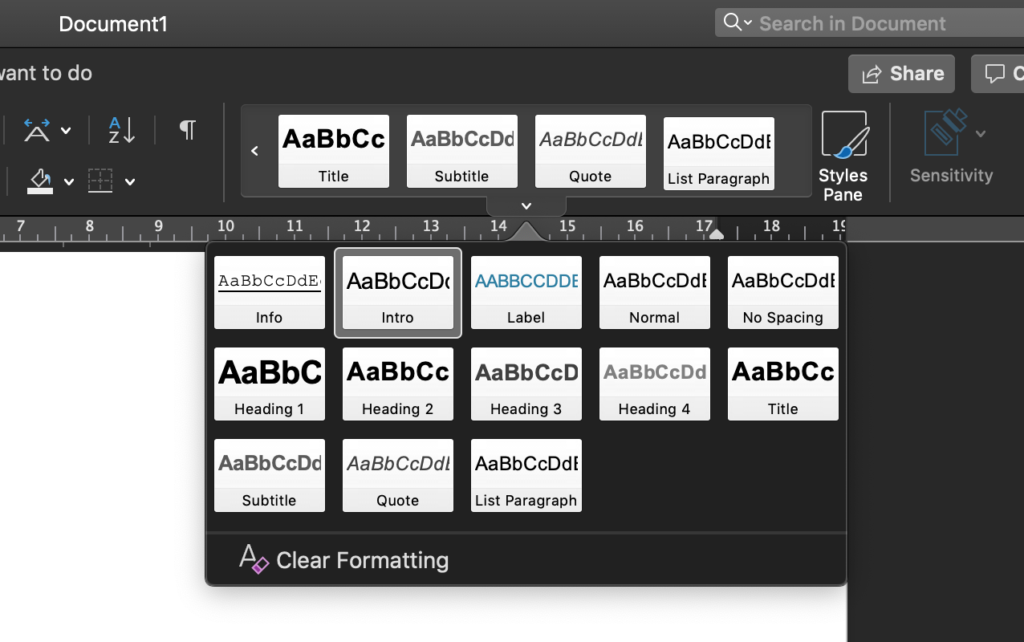
“Normal” is the style for the text in all of your ordinary paragraphs. If you define this style – i.e., choose the font, size, colour and spacing for it – you can set the font, colour, size and spacing for ALL the normal text in your document! No more having to format each paragraph separately, no more wondering why the font you chose didn’t stick!
Step 2
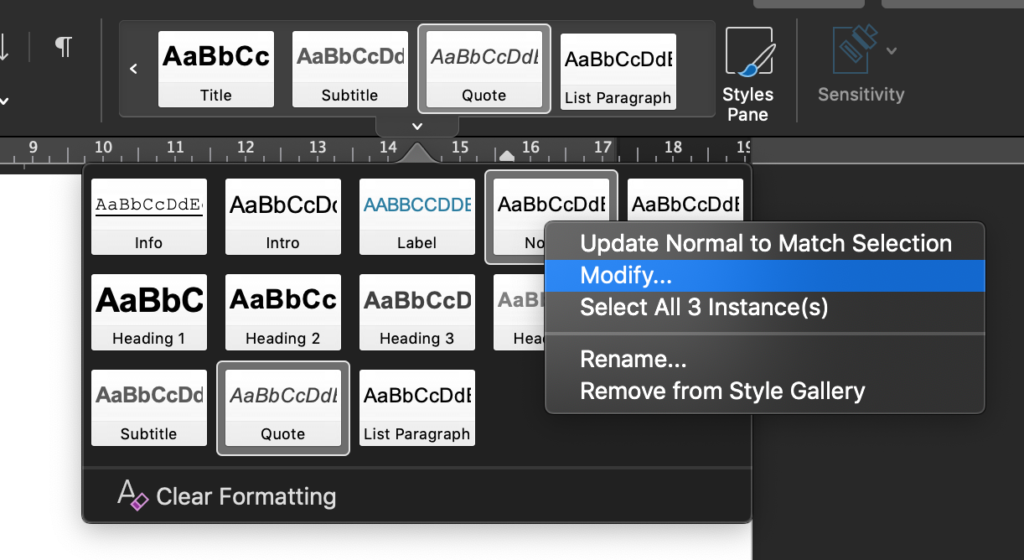
To set up the “Normal” style, just menu-click it and choose “Modify”. If you want to set up the spacing, say by adding a bit of space after each paragraph, choose “Paragraph” from the little select box at the bottom-left.
Step 3
After you click ok, you’ll see that all the text in your document with Styles based on “Normal” have been updated with your new choices!
Step 4
You can do the same thing for your Heading 1, Heading 2, and any others you need. Then use them by clicking the paragraph you want to format, then clicking your chosen style in the Quick Styles box.
Formatting your document with consistency is now very quick and easy to do!
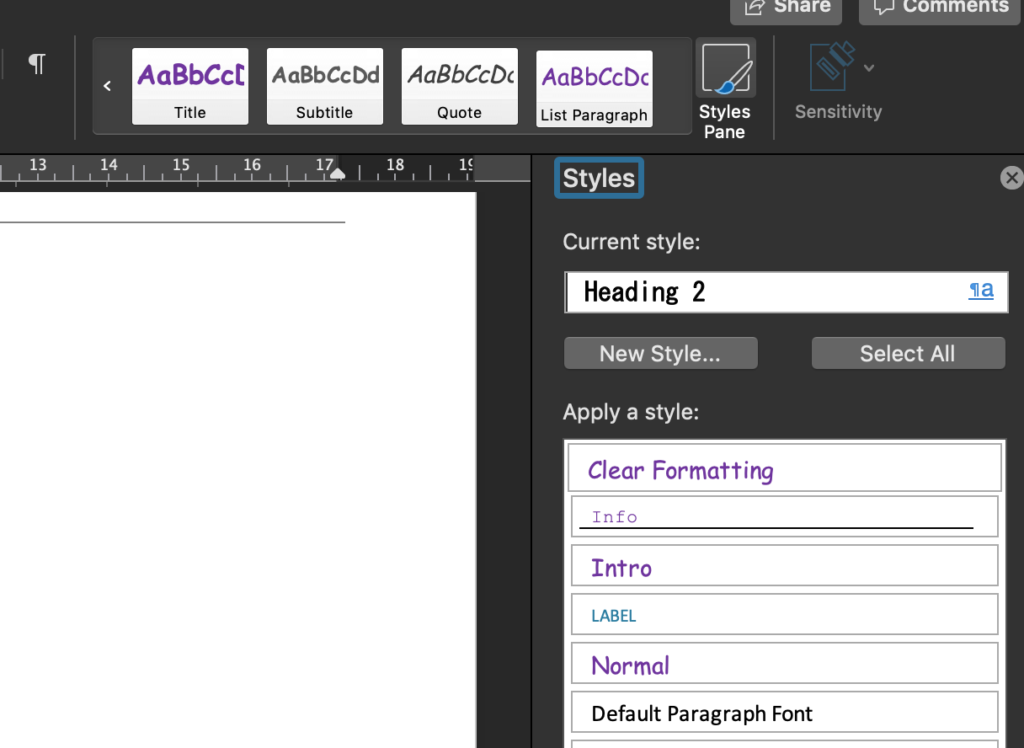
You can even create and name your own Styles if you want. Just click “Styles Pane”, then “New Style…” in the pane that opens up.
Step 5
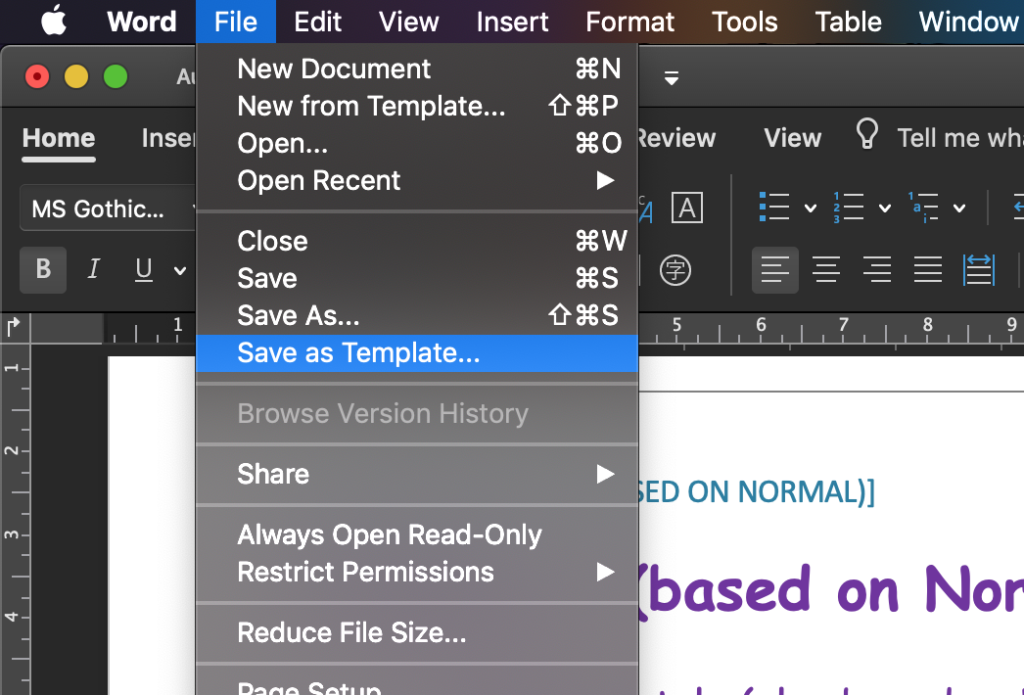
Styles become really big time savers when you save your favourites in a template.
To do that, define your styles first. Then go to the File menu and choose “Save as Template…”. Any text you put in your document will be saved in the template too.
You can use styles and templates creatively to make whole sets of beautiful and consistently formatted documents.
The next time you open Word, you can click your template and start a new document with all the styles you defined already there for you to re-use.
Give it a try! I promise you won’t regret it.
2 Choose styles faster by setting shortcut keys
Phew. That first tip was long, but I felt I had to do my bit to help people get the hang of styles. The rest are for more experienced Word users.
I love this next tip because:
- It makes Styles even more efficient. The Quick Styles box isn’t really that quick, because it only shows 3-4 styles until you click it to expand it. With this tip, you can choose your style super fast, without breaking your typing rhythm.
- It was the one feature I missed from Google Docs, and I’m really glad it’s been added to Word now.
So, here’s the problem. I switch between the same few styles often when typing a document – Normal and Headings 1-3 mostly. I don’t want to look away and go clicking around to find the style I want, because that slows me down and breaks my train of thought.
The answer? Assigning shortcut keys to select styles, so you can do it without thinking.
The shortcut keys I use are based on the ones in Google Docs, because I’m familiar with them:
- Normal: Cmd + Alt + 0
- Heading 1: Cmd + Alt + 1
- Heading 2: Cmd + Alt + 2
- Heading 3: Cmd + Alt + 2
You could use whatever shortcuts you want (assuming they aren’t already in use).
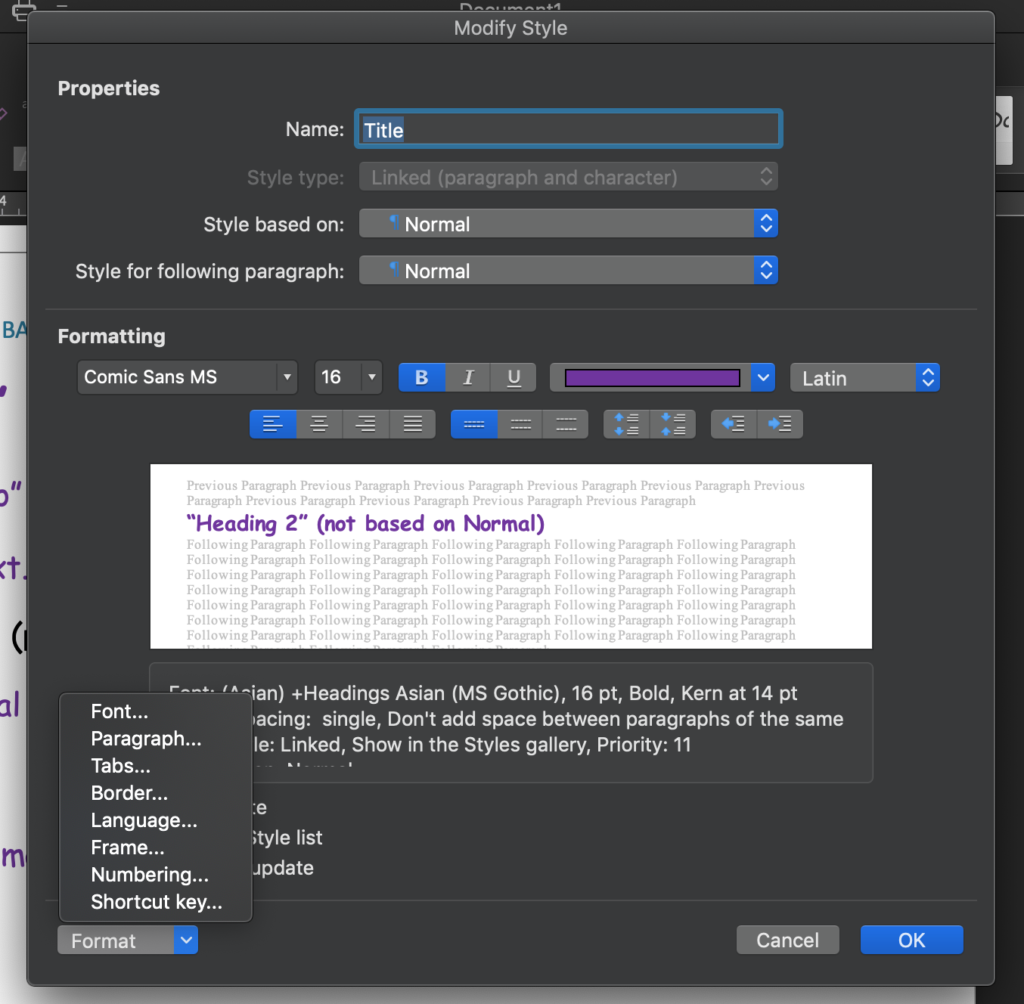
Here’s how you do it in Word on a Mac:
- Menu-click the style you want to set a shortcut for, and choose “Modify”
- In the select box at the bottom-left of the Modify Style box, choose “Shortcut key…”
- Type your shortcut key and click OK
Now you’re using styles like a real pro, and you aren’t slowed down by the so-called Quick Styles box!
3 Become an image-pasting master by choosing a default “Wrap text” setting
We all need to add pictures and photos to our Word docs now and again. But it’s never as simple and intuitive as it should be. And I believe that’s because of the way the “Wrap text” feature works.
“Wrap text” is actually a useful and important feature. It’s the one that lets you choose whether your Word doc image…
- Stays in a fixed position, or moves with your text
- Sits on top of or behind your text
It gives you all the control you need over images.
Yet… I think there’s something the human brain just doesn’t like about “Wrap text”. Because many users seem to believe Word should automatically know which setting they want. They ignore the “Wrap text” setting, and then they get frustrated when their images don’t behave how they expected.
And when I say “they”, I really mean “I”. Because I’ve wrestled and struggled with Word images soooo many times.
Eventually, I discovered that “In Line with text” is the way I expect images to work in Word. That’s where the picture sits on its own line, and it moves down when I type something above it. It doesn’t get in the way of my text, and it doesn’t end up in the wrong place when I type something new.
Then I discovered that I could set “In Line with text” as the default way for images to work in my Word docs. And after that, I never had to think about “Wrap text” again!
Here’s how you do it:
Step 1
Figure out how you prefer images to work in Word. I recommend “In Line with text”, but you might need to experiment a bit to find your preference.
Step 2
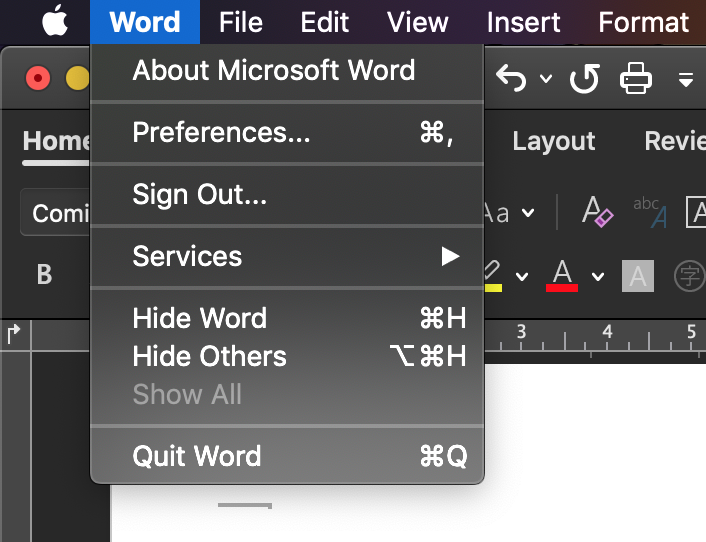
In the Mac menu bar, go to Word > Preferences and then choose Edit.
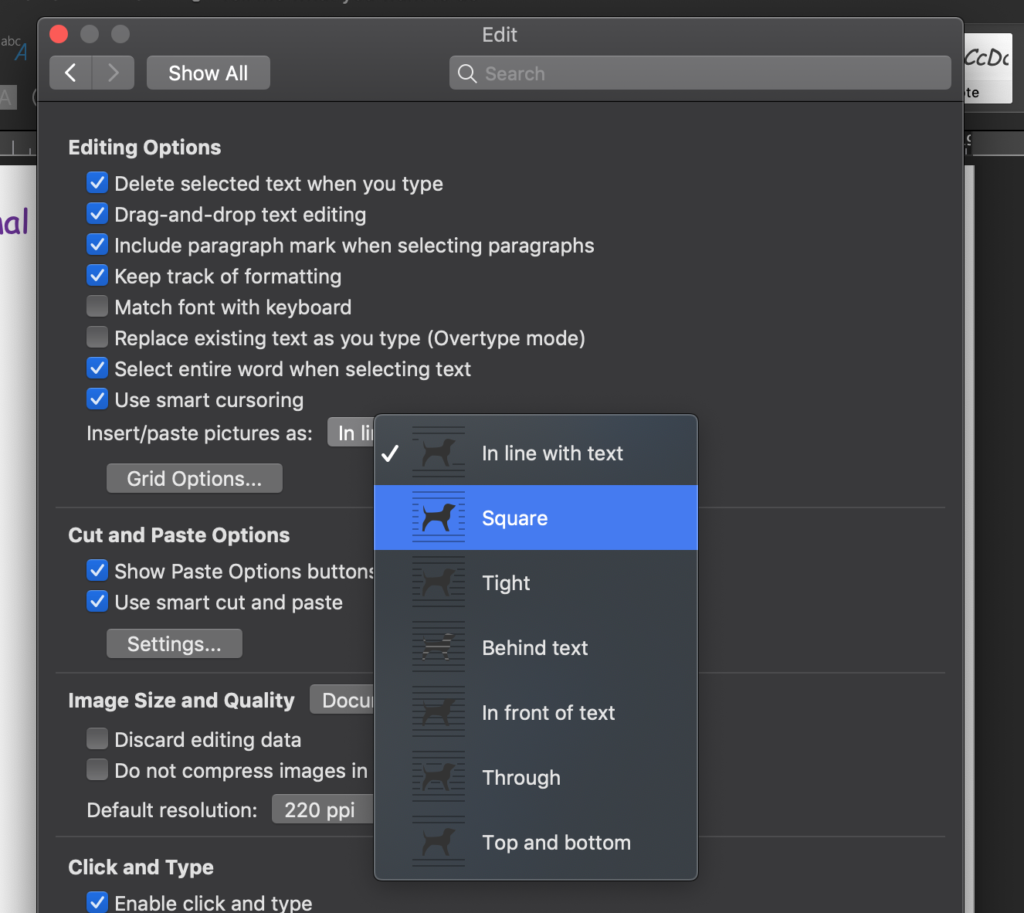
Step 3
Find “Insert/paste pictures as” and choose your favourite option.
That’s it! Now you never need to think about Word wrap again, either. And if you change your mind about how images should work in your docs, you know how to change the default again.
4 Swap Cmd+V for the “Paste Special” shortcut key, so you always know what to expect from pasted text
In Word, users often have the same problem when pasting text as with pasting images.
The default paste settings are not what you want, but you don’t know how to change them. Well, now you will.
If you’re anything like me, you copy and paste text into Word docs often. Sometimes it’s copied from websites, sometimes from other docs. So the text is often in a different colour, size and font to how you want it to look in your own doc.
If you use the basic Cmd+C/Cmd+V or mouse methods of copy-pasting, pasted text keeps its original colour, size and font. You then have to reformat it yourself. It’s a pain.
It also doesn’t fit with our fast new Styles-based approach to writing Word docs – because our paragraphs already have the style we want. Personally, I only ever want to paste in the plain unformatted text, so it can take on the style of my current paragraph. Why that isn’t the default, I have no idea.
Thankfully there is a way to do it. It’s called Paste Special, and on Mac the shortcut key is Cmd + Ctrl + V.
When you press Cmd + Ctrl + V, you get options that let you control which type of paste to do. And if you pick “Unformatted text”, you just got plain text. No formatting, no links, no anything. It’s ideal for pasting text from a web page that has inline links, when you don’t want to keep those links.

And if you do want to keep inline links? Cmd + Shift + Ctrl + V is what you need. It’s the shortcut for “Paste and Match Formatting”. And it’s even faster than Paste Special, because you don’t have to click any options.
So if you don’t like the way Word pastes text, stop using Cmd+V and start using…
- Cmd + Ctrl + V if you want unformatted text, removing any embedded links
- Cmd + Shift + Ctrl + V if you want the pasted text to take on your current paragraph style, but you want to keep any links in the text
And if you’ve been using the mouse to copy and paste all this time? Give all these shortcut keys a go – they really speed up your work once you get used to them!
5 – Bonus Word for Windows tip – change text to uppercase, lowercase, title case or sentence case faster
Here’s one more, and it’s another tip for pasting text more easily and quickly.
However, this one’s only in the Windows version of Word. And the main reason I’m mentioning it is because I wish it was in the Mac version!
You know how sometimes you need to paste text into a doc, but it’s in the wrong case? Either it’s all in caps but you need to put it in a regular sentence, or it’s all lowercase and you need it in caps.
One option is to re-type it. That’s pretty slow.
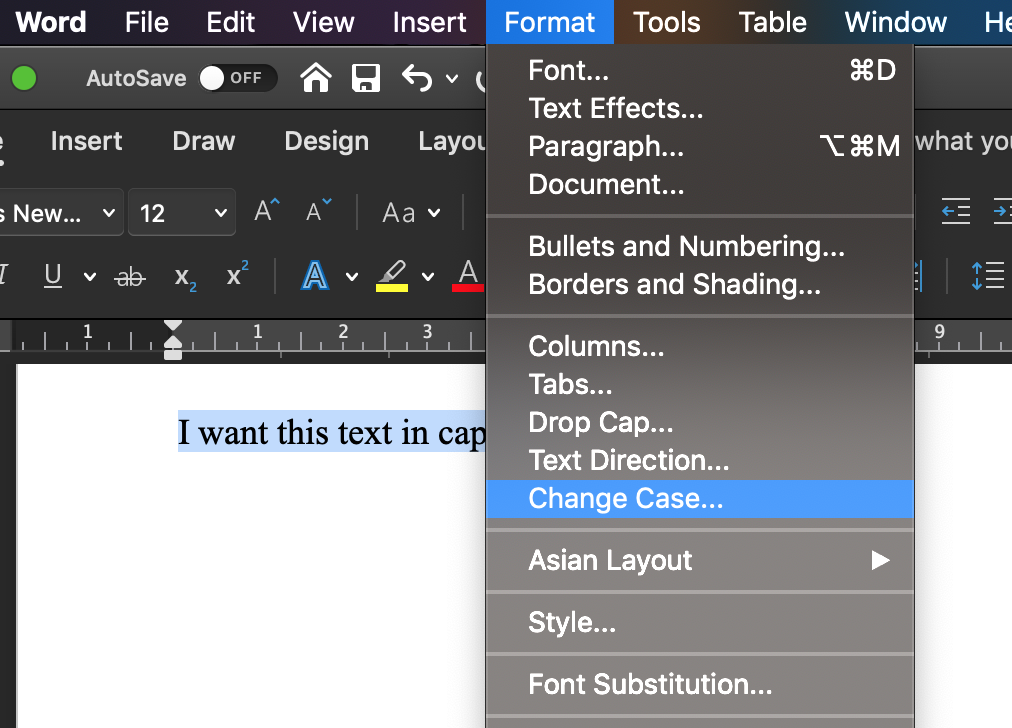
Another option, which Mac Word users can do, is to select the text and pick “Change Case…” from the Edit menu. That’s fine.
But on Windows? You can just use the shortcut Shift + F3 to change the case of text.
Why no shortcut key for the Mac version, Office developers?
And even though tricks like these seem like they would make a tiny difference, believe me – when they become second nature, they all combine to save you a lot of time and make your writing flow much better!
Share your own tips or ask me a Word question!
You’ve just read about my personal favourite Word tips – but there are obviously lots more useful Word features that aren’t covered here. If you have your own favourite tip, I’d love it if you shared it in the comments.
And if you’re still stuck with Word? I’d be happy to help via Twitter or email.
Thank you for that info re text wrapping, but I need to wrap text around the pictures not just top and bottom. Is there a way I can do this as it won’t let me even though I have put ‘Square’ as my preference